15.2.11

Bronze Your Bod in 60 Seconds

Self tanner has been my savior.  There are so many types and products out there, if anyone has tried them all, it is me.  For over eight years now I have been consistently using the same thing when I need a tan, and I need a tan that is fast!  Mystic Tan developed a spray tan booth in 1998 that has been a huge hit with everyday people and celebrities alike.  DHA (dihydroxyacetone) is the main FDA approved ingredient that most self tanners contain.  Tanning salons and spas all over the country have this unit and charge anywhere between $15-$40 a tan.  I buy mine in packages to get the best deal.  If you think about it; you spend money to tan in a bed that takes several visits to achieve your ideal color, add on the crazy hyped up $60 bottle of tanning lotion and you will find that spray tanning is in fact less expensive and much faster.  Oh, and you wont look like Clint Eastwood later down the road.


I will never be tan naturally (thank you Irish genes!)  It took me over a decade and a bout with squamous cell carcinoma  to figure that out.   I slapped on the oily lotion and fried in tanning beds for years trying to be a bronzed, exotic beauty.  Instead, I got more freckles and a few wrinkles.  As a child, I aspired to look like Brooke Shields on Island of the Blue Lagoon.  But no, I was better off aspiring to be casted in Children of the Corn, as you can see.
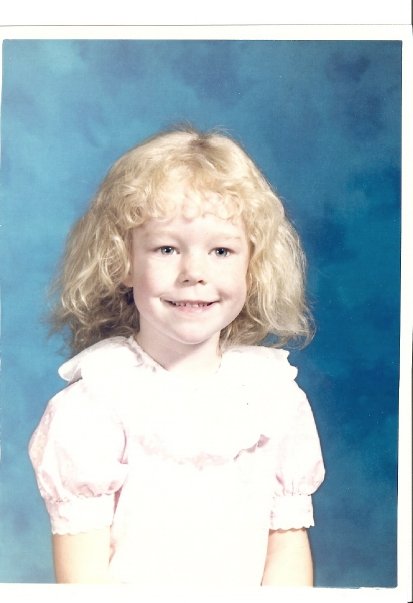
Albino with a perm?


Tanning in the Mystic Booth:

You literally disrobe, apply a barrier cream to your hands and feet, step in, assume position, spray one side, turn around, the knobs move up and down spraying evenly and efficiently.  After the spray is complete you step out and towel off and get dressed. Ta-da!  In under 10 minutes you are done.

Some tips from me:
*Exfoliate heavily before you do it
*Do not wear any lotion or cream the day you do it
*Wait as long as possible before you shower-while they say 4 hours, I say let it marinate over night.
*Maintain your tan by moisturizing twice a day and not exfoliating.
*Face backward away from the sprayers your first time when you start so you do not get too startled and pee.
*Do not plan on having a hot date the same day you spray.

Thank you Mystic Tan.  And Photoshop.


PHOTOGRAPHY:  Rob Mills


7.2.11

Ole Ole Oribe!

One of my agencies sent me to this fabulous hair workshop/extravaganza last week that featured styling instruction by the iconic Oribe himself.  Pronounced "Or-Bay"

If you are not in the hair and beauty industry, he is a styling genius- who has been in the business for more than three decades, dresses to the nines and has that silver fox/ambiguous age thing going for him. My favorite part; he has both arms tattooed with sleeves.  Um,  hot?!  His hands have touched and perfected celeb manes including Heidi Klum, Cindy Crawford and Jennifer Lopez to name a few.   His work is seen in all the major fashion magazines across the globe.  Read more here:  http://oribe.com/index.php/pages/119


With Frank Sinatra blaring, hair spray so thick in the air you could taste it and see it manifesting into clouds under the spotlights, it was ON!
Several hair models were lined up with a stylist, who then performed two looks on the model with Oribe running around to each station, critiquing, praising, rushing and flailing!  Both looks were photographed with Oribe on the sidelines screaming, "TOO PRETTY!" and running up and tugging our hair, smearing our makeup a little bit more and pinning strange accessories to our head.


Two of Oribe's signature products were used during the demo.  The styling spray was sturdy and used for the initial pin curls in the beginning.  Best part about the hairspray:  YOU CAN BRUSH IT OUT.  From there, to create  more volume, my wonderful stylist Sara sprayed Oribe's texturizing spray throughout the hair in 2 in (or so) strips.  She teased a bit and whipped this  reverse Audrey Hepburn inspire up-do in less than 10 minutes:

With my stylist Sara and Oribe

After the event, I hopped on the A train to get to work, slung drinks for several hours and got home in the wee hours of the morning.  
My hair STILL had drag-queen envied volume.... See!

Actual photo taken at 1AM the night after the Oribe event.  Not even extensions!

My Point
You do not need an hour to clip in those extensions or set your hair in rollers to get an extra vavoom volumizing lift.  In less than 10 minutes this fizzy lifting potion will do the trick.

  They gave all the models product that included $39 shampoo and conditioner.  I just started using it but will surely give an update when I run out and have to switch back to my Pantene.  Unless they start paying their models a little bit more.....haa.

1.2.11

Plump Yo' Pout

Bigger lips=hotter mouth.

Don't believe me?
Who would you rather make out with?  Angelina Jolie or Jodi Foster?
 That is, if you were a guy, a lesbian, or drunk in college. 
 (Assuming the majority of my audience is female)

I have done makeup on models with lip injections many times.  Some look great, some look fake, and then there are the ones that look uneven...and lumpy.  So temporarily, until a more natural remedy comes out, I have a couple tips on creating the illusion of fuller lips, as well as a couple of plumping products that I recommend.

Makeup Artist Jodi to the Max out of Atlanta did a great job here in creating a fuller lip.
And thank you lighting, spray tan...and photoshop for the rest of the look.  PHOTO: Seraphim Studios


Just as you would contour your face to create cheekbones and highlight the areas you want to stick out, you can also play with light and dark to shape your lips.
  Here is a step by step guide if you have no idea what I am talking about.
1.) Start with a lip pencil the same shade as your natural lips.  Outline your lips where they meet your normal skin- no clown-mouth!  Lightly fill in the lips especially at the corners creating your lips distinct shape. 
2.) Lightly feather the outside of your lips with either a concealer (Lighter than your natural skin tone) Or CARGO's magnificent reverse lipliner.  (It hi-lights the area around your lips )
3.) Apply your lip color as you normally would (I prefer a creamy lipstick applied with a lip brush)
4.) Put a small dot of concealer on the center of your bottom lip and rub together.  (Creates fullness)
5.) Add a tiny dollop of clear gloss, centering it on your lips. 

                         Voila!   

I have tried alot, I mean A LOT of lip plumpers out there on the market.  Essentially they all do the same thing- create bloodflow to the lips using oils or ingredients that may irritate or cause swelling.  All results are subtle and last only an hour or two but hey they sure beat chapstick.  Here are my top 3:


  •  Lip Venom by DuWop- Stings a little, but effective.  Uses oils such as wintergreen to increase circulation to the lips.
  • Lip Fusion- Pricey but smells fantastic and is creamy and moisturizing.  Comes in some great colors and has subtle plumping effects.
My Personal Favorite
 ( I may as well factor it into my monthly budget because I go through it like I go through TP)

Buxom Lips by Bare Minerals.  $18 at Sephora;  It is all natural (no parabens, sulfates, etc) infused with antioxidants and minerals.  Comes in an array of fabulous shades, smells great and you can feel the cooling, tingling sensation when you apply it.  Its really fun to sip off of a guys beer and then notice how he starts to feel it too.